Today I would like to show to you how to sew a fanny pack/waist bag. Contarary to appearances it is not very hard. To execute it you will need: about 50x40cm (20x16inches) of fabric, the same amount of heat activated adhesive interfacing, zip, carrier tape, side release buckle and a pattern (you can download it from here).

Let’s start with trimming elements from fabric and interfacing. You have to leave 1cm (0.4inch) allowance to the elements made of fabric , while interfacing elements have to be cut without it.

Next step is to iron interfacing to fabric, and we get elements like in the picture below:

It’s time for sewing. Let’s begin with connecting zip to the front of our waist bag. It should be done in the way shown in the photo below:

Alternating step is to indent corners like in the picture so that the fabric after tucking in those spaces wouldn’t stretch and for fanny pack to look aesthetically.

Next you should tuck indented wings of fabric on both ends of zip and pierce through like in the picture.

Another step is sewing on the top of our fanny pack.

Fasten the top part with the front of a waist bag using pins on the line of the zip.

Make seamline along the line of pins, after that you will get something that looks like something similar to the fanny pack.

Now it is time to sew along both edges of zipper in about 5mm (0.2 inch) distance. Those seams are supposed to prevent zip from coming out after unfastening the zip.

Following step is to sew on the back of waist pack. Fasten the top edge of a back in the way presented in the picture below. Keep the seam along line of fastening.

Connect parts in the bottom using exactly same technique.

Our fanny pack should look like this after putting it on the proper side:

Now we are going to sew on a carrier tape with buckle. Cut about 12-15cm (5-6 inches) of tape and put it on one of the buckle elements, like in the picture. Put ends of tape in one of gaps left in ends and sew on. Sew the remained part of the tape to the second end and put on the second element of the buckle.

Fanny pack has a tape and buckle sewn in.

The only thing left to do is to make two seams on both ends of fanny pack in the way shown in the picture and our sachet is going to be ready. Those connections are responsible for separating usable part from tape endings.

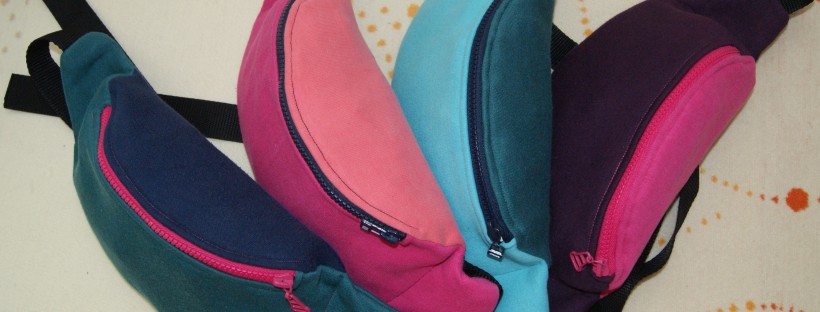
Zosia likes the results, what do you think about it?
If you are not encouraged by this style maybe the rest of my work will convince you to try making it by yourself. Sewing pattern is available here. I’m encouraging you to download it. Have a nice fun!


Jowita
Jakiej grubości jest flizelina?
Taka flizelina jest bardzo cienka, ma może około 1 mm grubości i waży około 40g na metr kwadratowy. Przy zakupie należy pamiętać, by flizelina była z klejem. Pozdrawiam i życzę owocnego szycia 🙂
Terrible instructions…
Thank you for your comment, what do you mean by that ?
I’m guessing the commenter is referring to the fact that your instructions appear to be written by a non-native English speaker. I am looking at your pattern for my high school sewing students who are new to sewing and would not be able to follow your instructions. I am an experienced bag maker and know the steps you are describing. I like the shape of this bag and will be making it myself soon.
Your English
I’m looking for somebody who will rewrite it 🙂
Your English is better than a lot of Americans! If you ever need help with English again just shout out. I’m at New Market Crafters. Thanks for sharing the pattern.
I had no problems following these instructions, maybe its user error not the instructions fault if you can’t follow pictures
fabuloso gracias muy lindo encantada ….
fajna. jutro sprobuje taka uszyc
Pozdrawiam i życzę powodzenia 🙂
Witam, Czy długość nerki to 50 cm? Jak długi zamek jest potrzebny? Bardzo proszę o podanie wymiarów nerki 🙂
Bardzo proszę o odpowiedź.
Witam,
jeśli chodzi o zamek, to minimalna długość jakiej używam to 22 cm. A co do wymiarów saszetki, to trudno mi powiedzieć, nie mam w tej chwili możliwości sprawdzenia tego, ale tutaj można pobrać gotowy wykrój w formacie pdf i wydrukować.
Pozdrawiam
Hi, do you have a pattern?
Yes, you can find it right here
Hej, niestety mi nie wychodzi tak jak powinno ;/ gdy zszywam przód z tyłem po bokach ,tam gdzie powinnam wszyc pasek> zostaje mi nadmiar materiału i robi się taka fałda, tak jakby jedna z części wykroju była za duża. Nie wiem co robię źle ;/
Witam,
nie ukrywam, że wykrój nie jest idealny, ale ja z niego korzystam i daję radę :). U mnie wygląda to podobnie, ale ja staram się w miarę możliwości spiąć elementy szpilkami i dopasować je do siebie, ale nic na siłę. Dużo na pewno zależy od materiału, z którego szyjesz, ja zazwyczaj używam dresówki, która jest elastyczna i można z nią popracować, ale z innymi też się da. Nie przejmuj się naddatkiem, który zostanie, po przełożeniu na drugą stronę, nie powinno być tego widać. Zszyj elementy tak, by pozostał otwór na taśmę nośną, a naddatek możesz przyciąć lub nie. U mnie on ładnie chowa się w środku. Na koniec zrobisz boczne przeszycia, które ukryją te końce w środku saszetki i po kłopocie 🙂
P.S. Wykrój robiłam sama, a nie mam w tym temacie zbyt dużego doświadczenia, więc praca z nim na początku nie jest łatwa, ale da się. Sama korzystając z niego uszyłam już dziesiątki saszetek
Pozdrawiam
Jowita
Witam..a moglabym prosic o wymiary poszczegolnych części?
Witam,
na szybko wymierzyłam elementy i wyszło mi coś takiego : Klik.
Mam nadzieję, że pomogłam 🙂
a jaka jest długość taśmy nośnej?
Ja wszywam 1m, ale to dla większości użytkowników jest za dużo. Wychodzę jednak z założenia, że lepiej więcej niż za mało, a przyciąć zawsze można 🙂
Hello
Thanks for the fantastic tutorial,
Please can you kindly advise the length of the zip?
thanx
Susan
About 20cm
many thanx, appreciated
Susan
witam czy wiesz może jak zrobić nerkę sportowa z dużą ilością kieszeni
Pierwszy wykrój, z którego wyszła mi nerka 😉 Faktycznie do kolejnej wprowadzę drobne poprawki (dłuższy zamek i lekko podkrojone boki) – zrobiły mi się zakładki na bokach i jak dla mnie wejście jest za wąskie. Ale i tak doceniam pracę i chęć podzielenia się wykrojem. Bardzo dziękuję!
Cieszę się, że wykrój się przydał i chętnie zobaczę efekt Twojej pracy
Thanks for a great pattern. I’ve seen other fanny pack patterns but they lack the depth your does, so not much fits in them. Do the pattern pieces include the seam allowance or should I add that to the pattern?
Thank you for your kind words, pattern pieces do not contain seam allowance so you should add them according to your preferences 🙂 If you want to share your work please send me picture to my email (jowita.boczulak@gmail.com)
Excellent pattern. Used a little stiffer material, two oz leather, so a little tough to turn inside out but great and easy instruction. Thank you
Hello!!! Thank you so much for sharing and explaining how to make the funny pack! It was so easy !!! Kisses from Brazil!
Brilliant pattern! Made it in an evening. Will be making more. Thanks from a Canadian in China 🙂
Thank you for the pattern. It was a quick sew and the pictures helped quite a bit.
it too nice
😊😊
Hey, how big was the buckle that you used?
Hi, i dont know what is the zip size please ? Verry good bag !
Thanks! How many inches is the zipper
At least 22 centimeters, so it will be about 8,7″
Please write sizes on pattern.
Ok I will try to do this but can you tell me the case that you need them ? When you will print it from pdf you will get exact sizes …
[Edit] You can find sizes here
thank you for sharing this instruction. very useful. I had no problems following these instructions, using google translate. turn out pretty good. greeting from malaysia.
Please am a young fashion and I love to make something new with our own made fabric so please help me by sending the measurements(the cm) in my email address
The measurements are given in here (click), but when you will print my pattern that you can download from patterns tab (it is in pdf) you will get the pattern in actual sizes.
I am very impressed by both the simplicity and the photos for this bag. A number of patterns online create “flat” bags which are not as useful, but are a heck of a lot easier to explain and sew, so it’s no wonder that they are so prevalent. This pattern provides you with an “authentic looking” belt bag! For free no less! Apparently the pattern maker and seamstress does not have English as a first language . All the more impressive – this is a fantastic tutorial and I commend you for going to the enormous effort of putting together instructions for those of us not lucky enough to be bilingual, as you are! Much thanks.
I am going to attempt this pattern in leather for my daughter. She will not be getting the Burberry version she covets.
Is the 1cm seam allowance included in the template?
I didn’t add any cloth to the original template and my fanny pack ended up being the desired size!
This is soooo cute. Can u make a tutorial for one like this but fully lined and a second zipper at the back please? Would be total love from me
how do i get the pattern if i do not live in Poland